Neil’s recent post Finding the Cat started with a question. Does the cat find you, or do you find the cat? In my case perhaps neither: like Dr Frankenstein, I created a new cat from a dead one.
I’ve always been fascinated by cars. My mother insists that, when just 18 months old and still in the pram, before walking or even standing on two legs, I’d not only tell her the colour but also the make of just about any car. She’s probably exaggerating. I might have known a couple like Mini or Jaguar, but was probably calling others Austin, Ford, Vauxhall or Triumph at random and she’d have been none the wiser.
In 1979 I learned to drive in my mother’s Fiat 500 F, a brilliant little car. It had no synchromesh, so I learned to double de-clutch. It had a tiny, 499cc 2-cylinder engine producing just 17bhp; choosing the wrong gear would mean grinding to a halt. 0-60mph was in minutes not seconds, only really practicable downhill with a following wind.
My own first brand new car was also a small Fiat, but completely the opposite. The Uno Turbo was great fun. It handled like a go-kart with an astonishing, rocket of an engine that delivered incredible acceleration. Flat out at about 135mph, not that I ever tried it(?!), the car felt as if it was dancing on tip-toe along the road – quite terrifying.
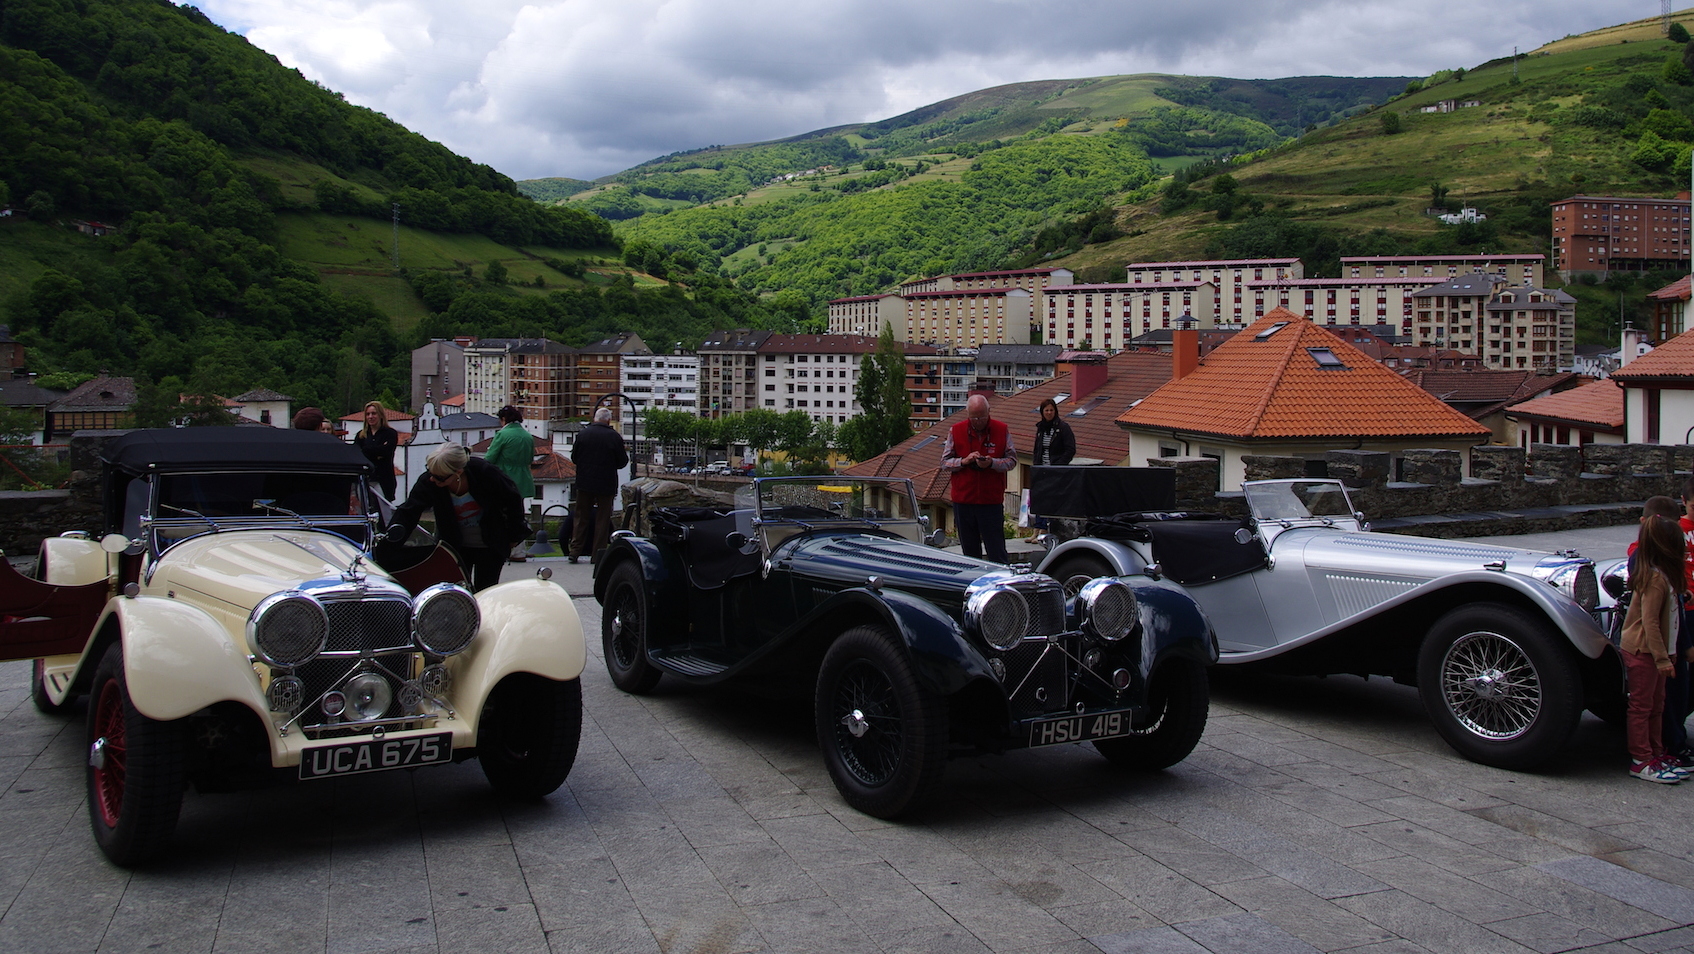
However, my true desire was always to own and drive a pre-war classic from the 1930’s, with big chrome headlamps, sweeping wings, running boards and bags of character – the SS100 always stood out as especially stylish – but preferably reliable too, with decent brakes for modern traffic.
I toyed with the idea of buying and restoring an old car but, having no mechanical experience – I did carpentry (very badly), not metalwork, at school – I’d absolutely no idea where to start. My answer came from the NEC classic car show and Goodwood Revival races when, 2 or3 years running, I kept seeing the Suffolk Jaguar stand with what appeared to be a pristine original SS100. On further enquiry I realized that it was, in fact, a replica – essentially a kit car – but so accurate a copy as to be almost indistinguishable from the original. I was hooked, and went for a test drive.
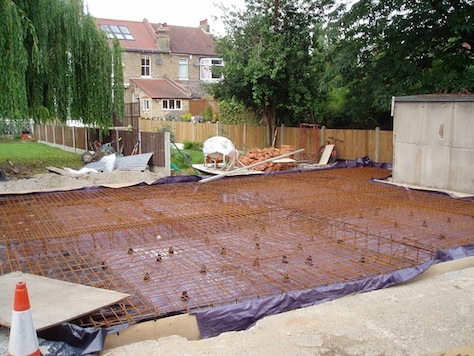
Suffolk Jaguar will build a car to order but, like most customers, I opted to build it myself and just source the parts from Suffolk. The first stage in my project, however, was to get planning permission – from the council, not a significant “other half” – and delivery of 2 tons of steel caging and 95 tons of mixed concrete for foundations. This was because, before anything, I needed to build two large garages with workshops (together with my neighbor) in which to work on the car. We employed a bricklayer but, otherwise, did everything ourselves during weekends, and I learned to do construction carpentry, roofing and electrical work in order to wire out the place and make it ready for car-building.
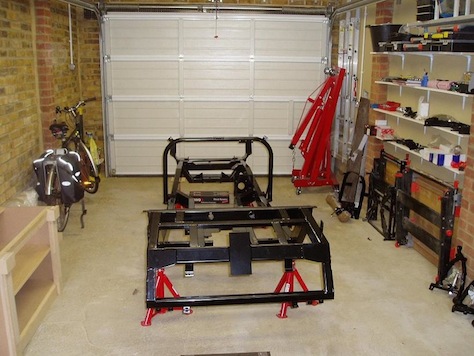
Having finished the garage and had it passed by the building inspector, I bought some tools (both imperial and metric sizes) and placed an order with Suffolk Sportscars. About a year later I finally took delivery of a brand new chassis with the rebuilt suspension and running gear, plus later the engine and gearbox, from a Jaguar XJ6. At this stage, as Suffolk Sportscars themselves say, it’s essentially just “big boys’ Meccano” so, once my neighbour had taught me to “put a bit of wellie into it” rather than trying to be too delicate with the spanner, I found it relatively easy to build up the chassis and engine. Suffolk Jaguar’s instruction guide is pretty basic with several gaps, but the 3 or 4 staff in their workshop are really helpful and put me straight on several occasions.
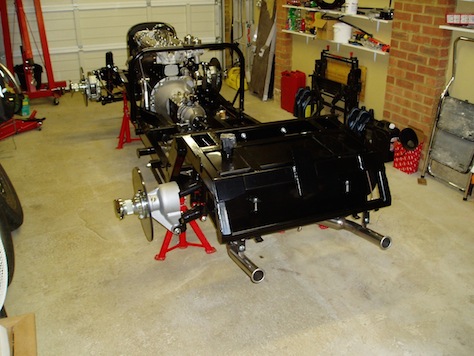
After another 9 months or so waiting, the next stage was to receive and fit the body (which I’d had pre-painted) and wiring loom with instrumentation, ready for test firing the engine. Interestingly, although most people think that British Racing Green is a traditional colour, in fact it was never offered on the SS100; the original option was Olive Green. I wanted mine to be as original-looking as possible and had spent months trying to find a dark olive green. But with no paint code, which weren’t recorded then, and no examples to copy from – olive green more or less disappeared after the 1930’s – in the end I just had to go with the flow and had it painted Jaguar Dark Green. It looks the part, but I do still half regret not having been able to find a good olive green, which might really have stood out.
Fitting the bodywork, including marine ply flooring, took lots of care as this would be very a visible part of the finished vehicle. The wiring was also a challenge because, despite the diagram(s), in practice the loom on almost every Suffolk Jaguar is unique. I had purple wires which didn’t exist in the diagram, red/white ones which were drawn but didn’t exist in my loom, plus extra wires in some places and not enough in others. However I gradually puzzled it out and apparently got 99% right; Mike from Suffolk Jaguar later told me, after testing and finishing the car, he thought I’d only really made one mistake. Black usually signifies earth so I’d earthed one wire which, in an exception to the rule, actually needed to go to the dip switch circuit.
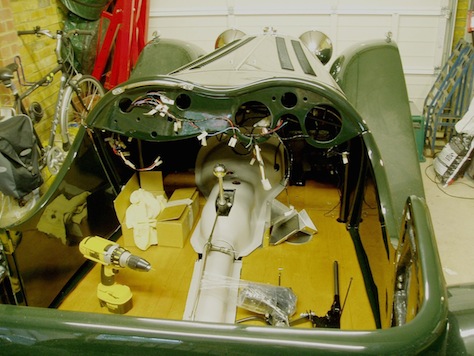
The final stage, apart from fitting the windscreen, was essentially about trimming – seats, hood, carpets and suchlike – and getting the car tested and licensed for the road. My skills with scissors and a sewing needle are non-existent, as any female member of my family would testify, and a good finish in these areas is essential. I also knew nothing about what was needed in the way of testing and paperwork to get it legally roadworthy, so I towed the nearly-finished car from my garage in Wanstead to their workshop in Pettistree, for them to do the finishing, and to arrange testing and licensing.
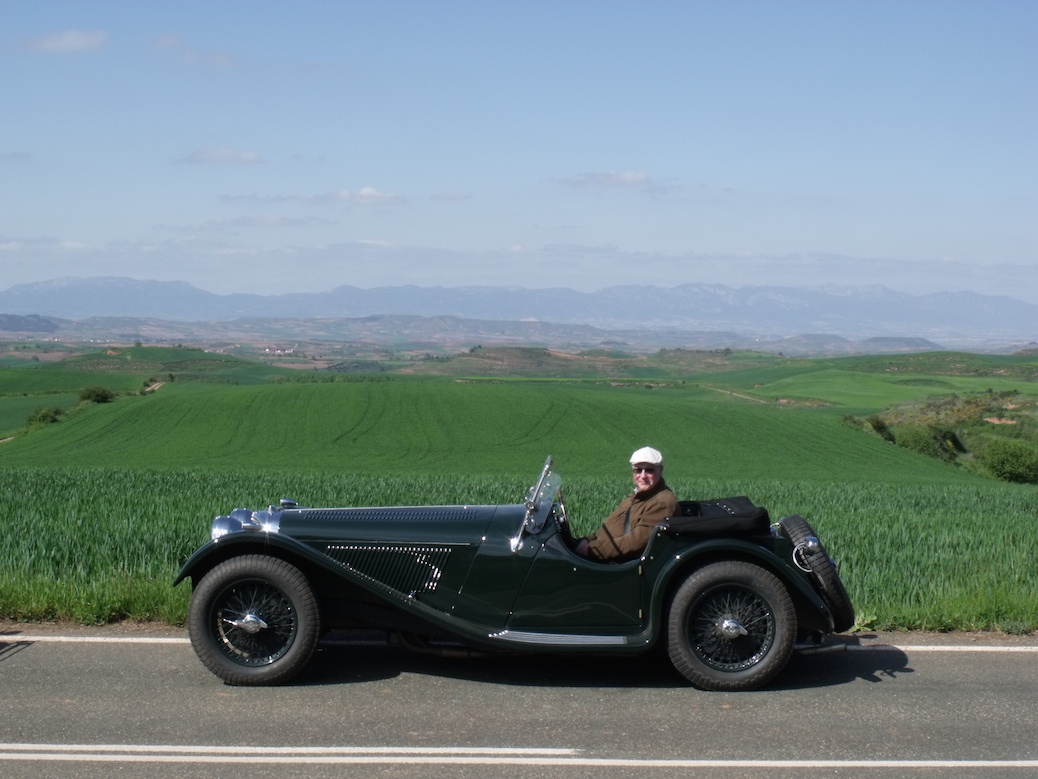
Four months later, in early September 2010, I arrived to pick up the finished car and drive it home for the first time. There were some squeaky moments in the first few miles – switching from an automatic Mercedes E-Class, it takes some getting used to a manual gearbox with no power steering or ABS and a tiny cockpit with very narrow footwell. However, I’ve now clocked up over 12,000 miles taking it to shows and on holidays in all weathers around England, Wales, Scotland and Spain. It’s fantastic fun to drive and definitely attracts attention.
Most of all, my enthusiasm for SS Cars (pre-war Jaguars), and almost any vehicle from the 1930’s, remains just as strong. As a next project, I’d love to find and restore a SS Mark IV, SS1 or SS2. But, being limited for money and garage space, I will look instead for a 1930’s motorbike. Now if I could also find an original Swallow Sidecar, from which the SS Jaguar company originated, to restore and go with it, wouldn’t that be something for the club stand? (“Yes, it is a Jaguar…”)
Richard Gibby